
How to Register a New Smartcard User
*UPDATED 07/08/2021 – New process to request card* This process describes how an ID Checker can fully register a new smartcard user without the need for the new user to visit the Registration Authority.
It is imperative that this process is followed carefully and carried out every time a new user is registered to prevent potentially damaging mistakes from being made. Entering wrong information is fraudulent.
Whilst this guidance can be used by any ID Checker across the country – it is intended for organisations where NECS provides Registration Authority services.
A detailed downloadable/printable PDF version of this process is also available. Please scroll down the page to the end of this process for the download link.
The following check list may help when registering a new user to ensure you have all the correct information to hand prior to beginning:
- New user’s name, date of birth and National Insurance Number (required for Duplicate Check)
- A digital photograph of the new user which must be taken by you the ID Checker at the time of registration in a face to face meeting with the new applicant which meets passport style standards. The photo (in jpeg or bmp format) should be transferred to your computer ready to be uploaded.
- THREE FORMS of identification from the approved standard list. Where a user is struggling to provide valid identification, has no photo ID, is a 16-19 year old with limited ID documents or you are unsure – please do not continue. Contact the Registration Authority for further guidance since the information must be entered in an alternate way.
If you are confident that you have all of the above information to hand, the process is as follows:
PROCESS STEPS – ID Checker Register New User
This process must be carried out by an ID Checker in a Face to Face meeting with the new card holder.
PLEASE REMEMBER to read to the end of the process to see details of how to request the card be sent to you.
Log in to Care Identity Service (CIS) using the appropriate role profile which has been set up with ID Checker access.
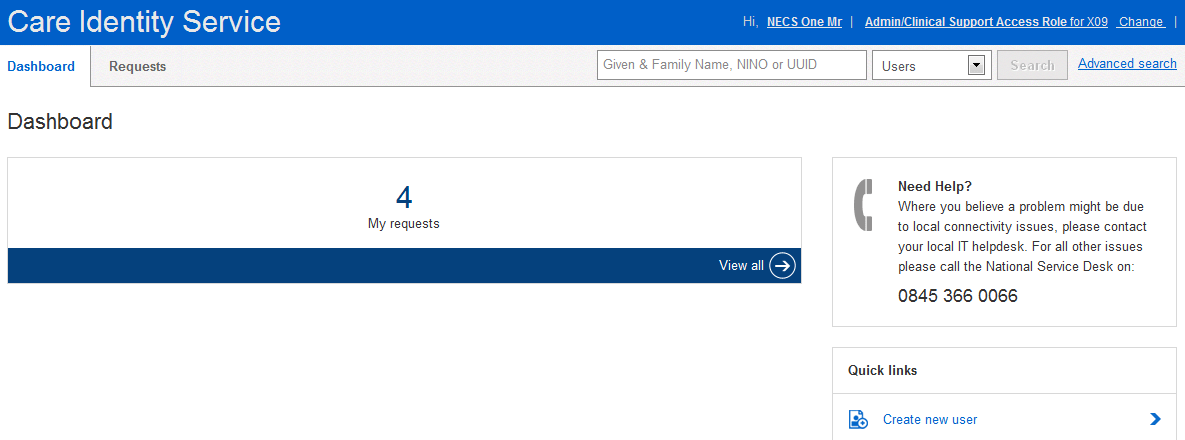
From the CIS Dashboard page, click on Create New User at the right. Quick Check: Please scroll down the page to check you can see the Identity Verification section which is below the Identity Photo section. If you cannot see the Identity Verification section you are not set up as an ID Checker and cannot do a full registration – please stop and contact the Registration Authority. If you can see the Identity Verification section please scroll back to the top of the page and continue….
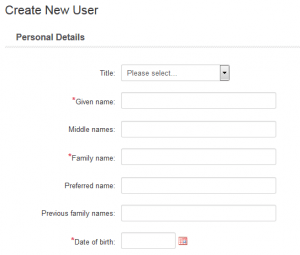
Complete the mandatory relevant fields for Given Name, Family Name and Date of Birth. (Name must be the person’s full legal name)
Preferred Name can contain a variation of the new user’s given name but must also contain their family name eg. Bob Smith and not just Bob. Do not enter titles such as Dr or Mrs here.
Continue to the Identifiers Section. The form may state that at least one of three identifiers must be entered. The NECS Registration Authority require ONLY the National Insurance Number (NI) to be entered here. Please DO NOT enter passport or driving licence details here (these will be entered later in the process). The NI Number is the best option to perform a duplicate check. Tab out of the NI Number field and click the Duplicate Check button.
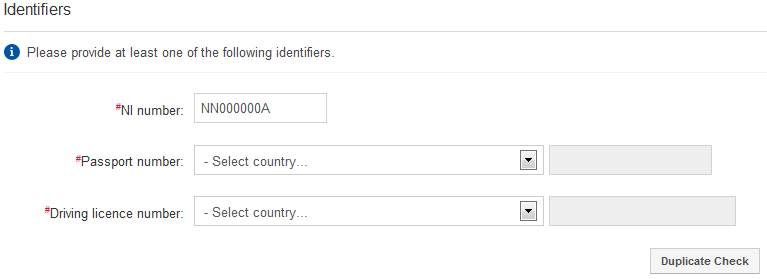
The system will search for possible matches to see if the new user may already be registered since a user must only be registered once on the system to maintain integrity. If any matches are listed, you can click their name to open the profile page to check. If the user is already registered, please stop and contact the Registration Authority for advice.
If no duplicate user is found, continue to the Applicant Contact Details. This section is not mandatory but any details entered here should ideally be work related contact details. Email address must be a Spine approved email address eg. nhs.net, nhs.uk, gov.uk or mod.uk.

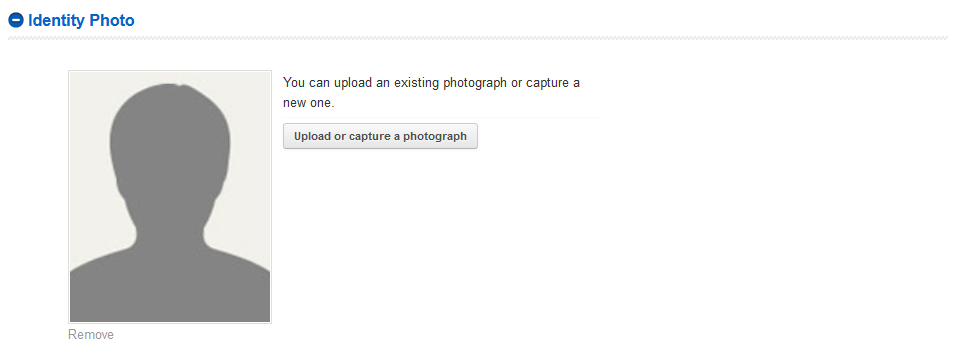
Continue to the Identity Photo section and click on the Upload or capture a photograph button. The photo upload tool should launch after a short while (Accept/Run/Install any security popups)
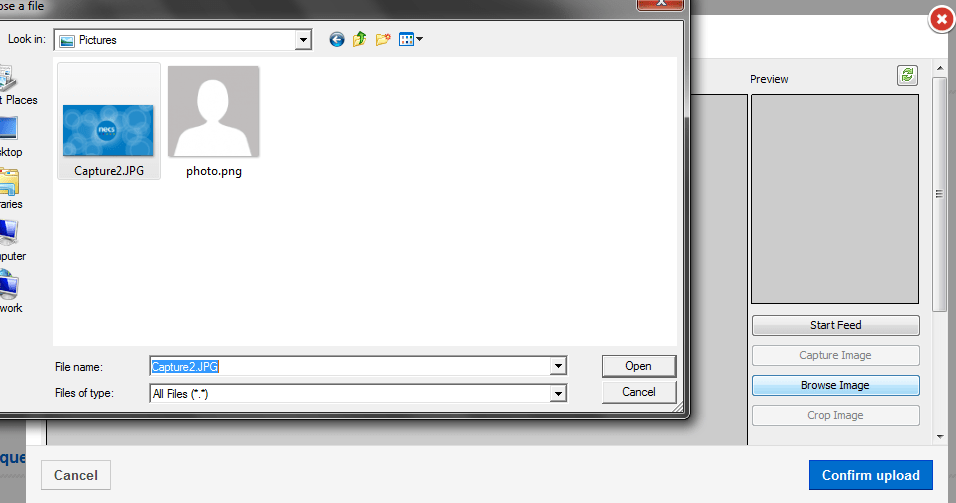
From the upload tool, click Browse Image and locate the photo of the new user. Double click it to upload it into the tool.
Click inside the red rectangle and drag to “frame” the user’s head and shoulders. PLEASE NOTE: If you cannot see a red rectangle, the image file size may be too small so please upload another one. See this section for tips on taking the photo. If the rectangle is too small, move the mouse cursor to one of the corners until it turns into a “double arrow”. Drag diagonally to enlarge the size of the rectangle. It can then be re-positioned by clicking inside the rectangle and dragging. If satisfied with the image, click Crop Image which will display a preview of the image which will be uploaded. Amend if necessary and re-crop.
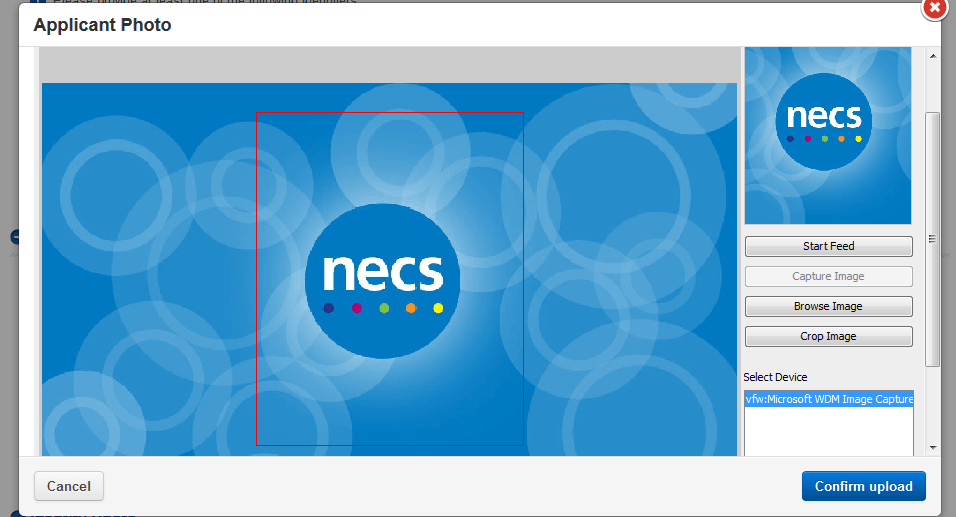
When complete, click the blue Confirm Upload button.
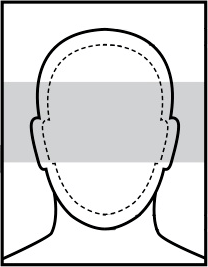
The uploaded image must look similar to the diagram to the left so that it meets passport style standards.
Ensure that you agree to and tick “I verify the photograph to be submitted is a true likeness of the applicant“.

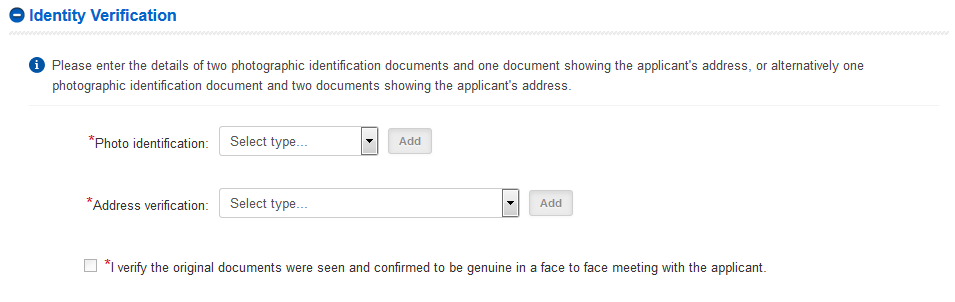
Continue to the Identity Verification section. Here, three forms of valid original identification must be entered – either two forms of photo ID and one address item OR one form of photo ID and two address items. There are two drop down lists – one list for photo identification and one list for address verification.
For example, to enter passport details as a photo ID, select Passport from the drop down list and press the Add button. Select the country from the drop down, enter the passport number and the expiry date from the passport.
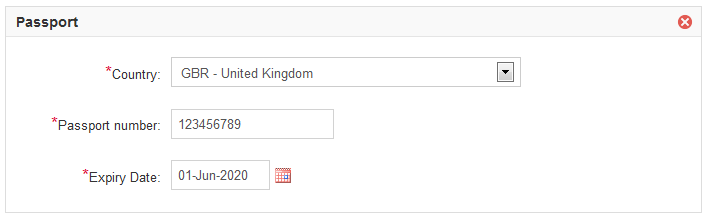
Repeat this process to enter two further identity documents in a similar way. Once three valid items have been entered please double-check to verify all ID information is correct, valid and conform to the identity check standards. If in doubt, PLEASE STOP and contact the Registration Authority. Do not enter items which are not permitted. Tick the box to “verify the original documents were seen and confirmed to be genuine in a face to face meeting with the applicant“.
![]()
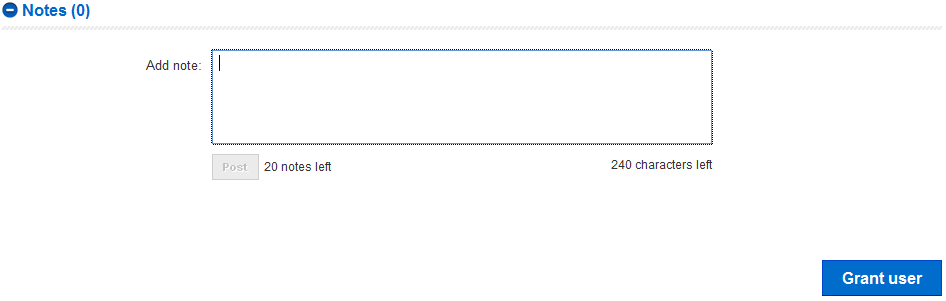
Review all the information entered and click the blue GRANT button at the bottom of the page. If the GRANT button is greyed out you may have missed a required entry.
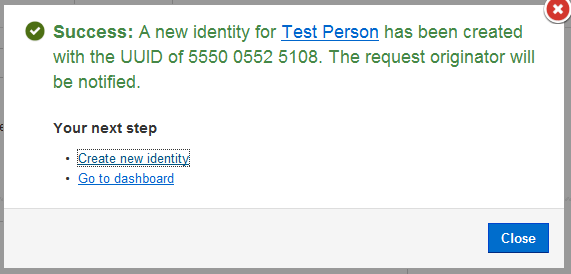
The new user will now be registered on the system and their 12 digit UUID will be created so make a note of the UUID and continue as below...
How to Request the Smartcard
PLEASE REMEMBER: The Registration Authority is NOT automatically notified when a new user is created by an ID Checker. Therefore, you must follow the below process in order for the physical card to be printed and posted to you. There are two ways to request the card – the NECS Digital Workplace or via email.
![]()
Requests for smartcards to be printed and posted can be made via the NECS Digital Workplace which is our online self service portal.
ID Checkers who already have a Digital Workplace account using their NHS.NET email address should log in via https://digitalworkplace.necsu.nhs.uk/
ID Checkers who already have a Digital Workplace account with an alternative email address should log in via the method given to them by NECS I.T. Dept.
ID Checkers who do not have a Digital Workplace account should request one from the NECS IT Service Desk on 0300 555 0340 (please keep your login information and login method safe for future use).
Please also contact the NECS Service Desk on 0300 555 0340 if you are unable to log in.
To request the card in Digital Workplace:
- From the Digital Workplace main dashboard select Request Something > Smartcard > Smartcard New Card. An online form will appear.
- From the “What kind of smartcard request do you need to raise” question, please select “New Registration Completed (Request Smartcard)“
- Enter the name of the newly registered user
- Enter the 12 digit UUID of the newly registered user
- Enter a brief summary of the ID documents which have been checked and entered into CIS eg. Valid UK Passport, Valid UK Photo Driving Licence, Gas bill dated xx/xx/xxxx etc.
- Enter the address to post the smartcard (GP Surgeries/Pharmacies – please include your ODS Code)
- Click Submit Request
If all details submitted are valid/correct and this registration process has been followed, a smartcard will be printed/posted. If more information is required the Registration Authority will make contact to resolve any issues.
If you do not have access to the NECS Digital Workplace you can request the card via email.
Send an email to ra.support@nhs.net and detail the following
- Name of the newly registered user
- 12 digit UUID of the newly registered user
- Brief summary of ID checked and entered into CIS eg. Valid UK Passport, Valid UK Photo Driving Licence, Gas bill dated xx/xx/xxxx etc.
- Organisation address to post the card to
If all details submitted are valid/correct and this registration process has been followed, a smartcard will be printed/posted. If more information is required the Registration Authority will make contact to resolve any issues.
Note: ra.support@nhs.net should not be used for any other purpose. If you have any other smartcard query, please contact the Registration Authority via the NECS Service Desk on 0300 555 0340 or necs.servicedesk@nhs.net
END
HINT – It is highly recommended that the local Sponsor adds an access position to the newly registered user’s profile in readiness for the smartcard being delivered.
Download PDF Version – CIS PROCESS RAA ID Checker Create New User
Download – ID Requirements for New Smartcard Applicants Standard List
Did this article help you? Please click the green button below if it did.